


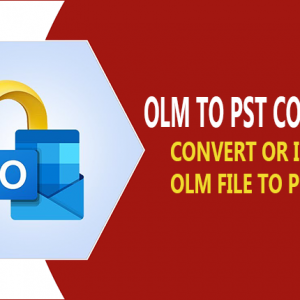


In this blog post, we’ll explain the step-by-step procedure for how to migrate OLM file into Office 365 account. We’ll cover both manual as well as automated ways to help you complete the Outlook for Mac to Office 365 migration.
While the manual approach is available, it can be time-consuming and may involve certain limitations. For users looking for a faster, more secure, and hassle-free solution, an automated method can be a more efficient option for importing OLM mailbox data into Office 365.
Mac Outlook users typically store their mailbox data in OLM files. But, when switching to a cloud-based platform, many users need to migrate their OLM data to an Office 365 account. The main challenge is that Microsoft 365 does not offer a direct option to upload or import OLM files.
If you’re looking for a reliable way to import OLM calendars, emails, contacts, and into Office 365, this article will walk you through the complete migration process. In this article, we’ll cover two effective methods to migrate OLM file into Office 365 account. Before diving into the solutions, let’s first explore the reasons behind this migration.
Benefits of Migrating OLM File into Office 365
- Access from anywhere: Once you import OLM emails into Microsoft 365, you can access them from any device with an internet connection.
- Cloud-based storage: Office 365 stores mailbox data on secure cloud servers, providing an additional layer of protection. After importing your OLM file, your important emails remain safe and backed up in the cloud.
- Improved collaboration: An Office 365 subscription includes multiple productivity tools that make teamwork easier. You can share emails, calendars, meetings, and other resources seamlessly with your team.
- Advanced security features: Office 365 provides built-in security, encryption, and compliance tools. This is one of the main reasons many users choose to upload OLM files to their Office 365 mailbox.
- Centralized management: Managing multiple OLM files locally can be difficult. After importing them into Office 365, you can manage all mailbox data from a single admin panel.
Manual Method to Migrate OLM File into Office 365 Account
If you prefer a manual solution, you will need a Mac system with Outlook installed. Follow the steps below to complete the OLM to Office 365 migration:
- Open Outlook for Mac and go to Tools - Accounts.
- Click Add Account and select the Set Up Your Email option.
- Add your Microsoft 365 email address & tick Continue.
- Type your username, password, and IMAP server details.
- Enter the correct port number and click Add Account.
- After the account is configured, go to the File menu and click Import.
- Pick Mac OLM file and tick Continue.
- Browse and choose the OLM file from your system.
- Click Import to upload the data into your Office 365 mailbox.
These are the manual steps to import OLM emails into a Microsoft 365 mailbox. However, this method has some limitations:
- You cannot select specific folders for selective migration.
- Proper account configuration requires technical knowledge.
- If the OLM file is corrupted or damaged, the manual method may fail.
Perfect & Quick Fix to Migrate OLM to Office 365 Account
If you want to directly upload OLM emails and other mailbox data into your Office 365 account, you can use the BitData Migration OLM Converter. This tool allows you to import OLM file data into an Office 365 mailbox in just a few simple clicks.
The software is compatible with all major Windows operating systems and provides a smooth, user-friendly experience without complex configuration steps.
In addition to Office 365 migration, this tool also enables you to convert OLM files into multiple formats such as PST, PDF, CSV, and other file types. During the migration process, it preserves the original folder hierarchy, email formatting, and data integrity.
You can download the free demo version to evaluate its features and understand how the OLM to Office 365 migration process works before making a purchase decision.
Final Verdict
To migrate OLM file into an Office 365 mailbox efficiently, you need a method that preserves important email elements such as attachments, metadata, folder structure, and formatting. While the manual approach is free, it has several limitations especially when dealing with large OLM files.
Using a professional OLM to Office 365 migration tool provides a more direct, faster, and error-free solution. It allows you to transfer emails, attachments, contacts, calendars, and other mailbox data from OLM files to Microsoft 365 without complex steps or technical complications.