


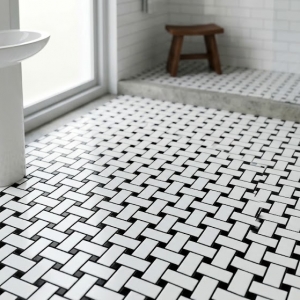


A sudden impact can leave a mark. Maybe you are moving a heavy canister of flour, or a child's toy goes flying across the room. When the noise fades, your eyes land on the damage. One small square in your backsplash or bathroom wall has a noticeable crack running through it.
Your mind may leap straight to a worst-case scenario. You imagine tearing out the entire section and spending a weekend covered in dust. But that drastic step is not required. You can fix that single unit efficiently, as long as you approach the job with care.
Because these decorative pieces are relatively small, they are well-suited for spot repairs. Larger slabs might require cutting out large sections, but a single unit can be targeted precisely. The main challenge is avoiding any disturbance to the healthy pieces surrounding it.
The following steps outline a reliable way to complete this type of repair.
Step 1: Obtain the Correct Replacement
Before you touch any tools, you need a replacement unit on hand. Search your storage spaces for any leftover stock from the original installation. Contractors and homeowners often keep a box of extras precisely for this kind of situation. Using those guarantees the closest possible color match, since batches can vary significantly over time.
If you cannot locate your leftovers, you still have options. Take a small shard of the broken piece to a local ceramic tile shop. The personnel there have experience matching discontinued patterns and colors, and they may be able to track down a suitable substitute.
Even if the replacement is not a perfect match, it is still a better solution than a cracked surface. One slightly different shade will be far less conspicuous than a damaged tile that catches the light.
Step 2: Round Up Your Supplies
You will not need a truckload of power equipment for this task. The repair relies on careful handling rather than brute force. Gather these basic items before you begin your work:
-
Safety glasses
-
A grout removal tool
-
A drill with a masonry bit
-
A hammer
-
A putty knife or chisel
-
A vacuum
-
Thinset mortar
-
Matching grout
-
A grout float
-
A cleaning sponge
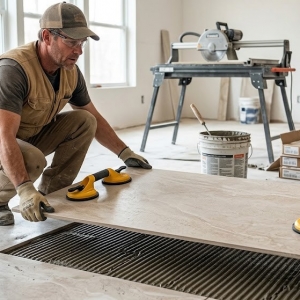
Step 3: Clear Out the Old Grout
This phase is absolutely critical. The grout surrounding the damaged piece forms a rigid connection to the adjacent tiles. If you do not remove it, the force from your hammer or drill will travel through that connection and fracture the neighboring pieces.
Put your safety glasses on and pick up your grout saw. Carefully cut into the joints on all four sides of the broken tile. You need to reach the substrate beneath so that the piece becomes completely separated.
This part takes some physical effort, but it cannot be rushed. Once the grout has been fully excavated, the damaged piece is effectively isolated. You can then proceed without putting the surrounding tiles at risk.
Step 4: Break the Damaged Unit
With the grout removed, you can start extracting the broken piece. Do not try to pry the entire thing out in one go. That method creates too much leverage against the backing. Instead, you want to crush the center into smaller fragments.
Use your masonry bit to bore a few holes into the middle of the tile. This weakens it significantly. If a drill is unavailable, a nail set tapped gently with a hammer works just as well.
Once the center is cracked, use your chisel or putty knife to chip away the pieces. Remove the fragments carefully. If any piece feels trapped near the edge, work it free slowly rather than yanking it out.
Step 5: Prepare the Underlying Surface
Now that the void is empty, you need to inspect the surface underneath. There will likely be dried adhesive, mesh remnants, or old mortar present. This material must be smoothed down to accept the new piece.
Scrape the cavity with your chisel to level out any high spots. Be careful not to dig too deeply into the wall itself. Once you have a reasonably flat area, use your vacuum to remove all the debris and dust.
Finish by wiping the spot with a damp rag and letting it dry completely. A clean, dry foundation allows the new adhesive to bond properly.
Step 6: Install the Fresh Piece
Retrieve your replacement tile. If it is part of a larger sheet of mosaic tiles, you will need to detach a single unit by cutting the mesh backing with scissors or a utility knife.
For the adhesive, you only need a tiny amount. Avoid mixing a full bucket of thinset; instead, use a small pre-mixed container or prepare a minimal batch from powder. Apply the adhesive directly to the back of the tile, which is known as back-buttering.
Press the tile firmly into the opening. It should sit level with the surrounding tiles, and the gaps should be consistent on all sides. Hold it in place with a strip of painter's tape and allow the adhesive to cure for a full 24 hours.
Step 7: Finish with Matching Grout
When the curing period ends, remove the tape. Gently press the new tile with your finger to confirm it is secure. If it feels solid, you are ready to apply the grout.
Mix a small batch of grout, using the same product from your original installation if possible. Use your float to press the grout into the joints around the new piece, ensuring the gaps are completely filled. Scrape away the excess from the surface.
Wait about fifteen minutes for the grout to stiffen. Then, using a damp sponge, gently wipe the area clean. Be careful not to disturb the fresh grout lines. After the haze forms, buff it away with a dry cloth.
Wrapping Up
That is the entire procedure. You have restored the area without having to remove the whole wall or spend a full weekend on demolition. Patience is the most important factor, especially during the grout removal stage.
Keep your safety gear on throughout the process. Once the final haze is buffed off, the repair will be nearly impossible to spot. The surface will look whole again, and you can move on with your day.